Create a Multi-Page JavaScript Boilerplate with Webpack 5, lint-staged, husky and github-actions (Part 6)


This is a continuation of Part 5.
This is the last part. In this part, we will set up Husky and Github-Actions.
Setup lint-staged and Husky
Pre-Requisite: Set up git in the project. Run command git init to initiate it.
It is a tedious process to run ESlint and prettier every time before committing to git. We want to run linter before committing files to git. Here comes lint-staged and Husky.
Install lint-staged
npm install --save-dev lint-staged
lint-staged — package is used to run linter on only staged git files
Update package.json file, add lint-staged configs to run linter on staged git files
{
/**/
 "lint-staged": {
   "*.{js}": [
     "eslint --fix",
     "prettier . --check"
   ]
 }
}
We will to use lint-staged in husky.
husky — It is used to improve git commits. It makes it easy to setup and manage git hooks in the project. Git hooks are scripts that are automatically executed before or after specific Git events, such as committing or pushing code. (github.com/typicode/husky)
Next, Install husky
npm install --save-dev husky
Let’s configure a pre-commit hook that will run linter before committing to git
Update package.json file, add prepare entry in scripts object
{
 "scripts": {
   /*...*/
   "prepare": "husky install"
 },
}
Initialize husky by running the command npm run prepare in the project directory
setup pre-commit hook
npx husky add .husky/pre-commit
git add .husky/pre-commit
This will add .husky/.pre-commit file
Open .husky/.pre-commit file and replace file content with this.
#!/usr/bin/env sh
. "$(dirname - "$0")/_/husky.sh"

npx lint-staged
lint-staged is setup successfully. On committing to git, ESLint and prettier will run. The commit will fail if ESLint or Prettier error occurs.
Make a commit and you should see lint commands running in the console
Setup Github-Actions
Last thing is to setup github actions
If a user comments out the pre-commit hook, then code with ESLint or prettier errors can be committed to git.
We want to make sure to push error-free code to repository.
Github-action is a tool to automate developer workflows and CI/CD processes. It is provided by Git Hub.
Navigate to the project directory and add .github/workflows directory.
mkdir -p .github/workflows
cd .github/workflows
In workflows directory, add a file named code-quality.yml
touch code-quality.yml
Add .yaml script in code-quality.yml file to run ESLint and prettier each time we create pull-request on github
name: ESLint and Prettier
run-name: Running ESLint and Prettier
on:
  push: # Trigger the workflow on push events for any branch
  pull_request:
    types: [synchronize, opened, reopen]
jobs:
  code_quality:
    name: ESLint and Prettier
    runs-on: ubuntu-latest
    steps:
      - name: Checkout code
        uses: actions/checkout@v2
      - name: Install node.js
        uses: actions/setup-node@v3
        with:
          node-version: 16
      - name: Install dependencies
        run: npm install
      - name: Run ESLint
        run: npm run lint
      - name: Run Prettier
        run: npm run prettier
1. name and run-name: Specify the name of the github action
2. on: We want to run Linter whenever code is pushed or PR is created on github
3. jobs: This key holds the actual script we are going to run
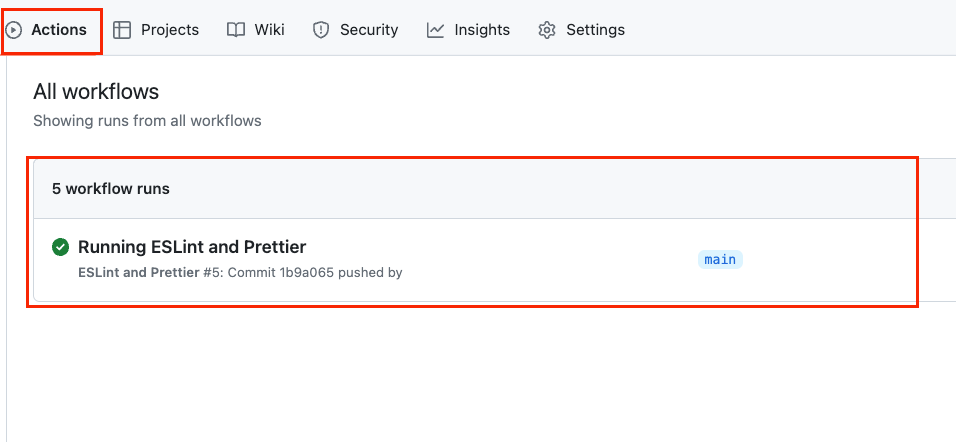
On github, In Actions tab, you should see GitHub action running whenever you push or create PR.
We are done! We have successfully setup JavaScript multipage boilerplate. We saw that Webpack is a powerful bundler. We can get maximum advantage by using plugins and loaders. It seems like a beast initially but once we get our hands dirty, we can truly see how useful this tool is.
Hope this article was insightful and feel free to drop your feedback!!
Find below the link to the boilerplate code we set up in this article
github.com/sehrishnaveed/javascript-boilerp..
Feel free to drop comments down below if you have any feedback.
Thanks.